Telehealth Hub Medical Device – Case Study
Manufacturing Services
3D SLA printing (master patterns); CNC machining; laser cutting and etching; vacuum casting with overmolding; silk screening and pad printing; polishing; painting
Materials
Heicast 8263, Al-5052, UPX-8400, PMMA, PX-5210, AL-6061, Somos 14120
Quantities
20 Sets
The Product
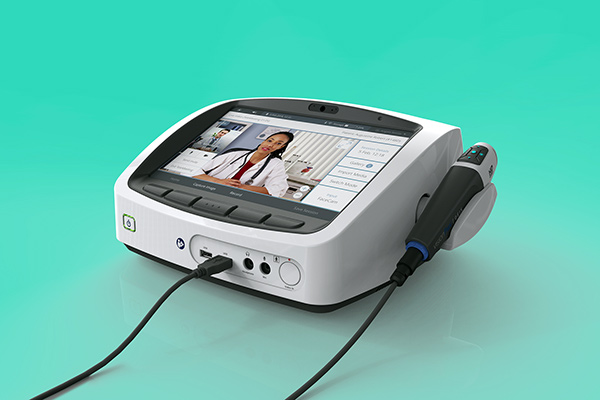
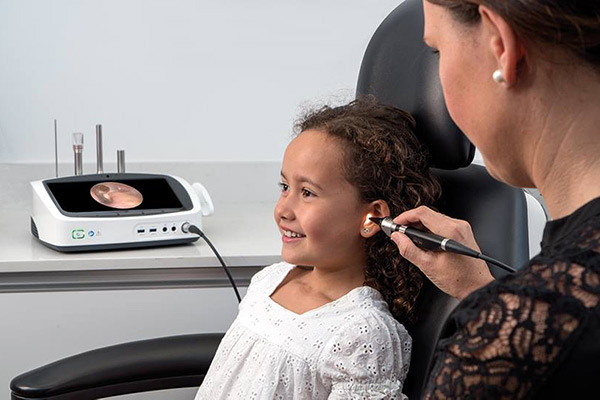
The ProEX Telehealth Hub by VisionFlex is a brilliant solution to a problem facing millions of people who lack direct access to advanced medical personnel and facilities.
With a variety of interchangeable probes, sensors and cameras, the ProEX lets primary caregivers perform a range of diagnostic tests including heart rate, blood pressure, spirometry, ECG, ultrasound and more. This data can then be wirelessly transmitted to clinicians or doctors anywhere in the world. This makes the ProEX ideal for remote communities, home hospice and elderly care, secure facilities, refugee camps and military personnel in the field.
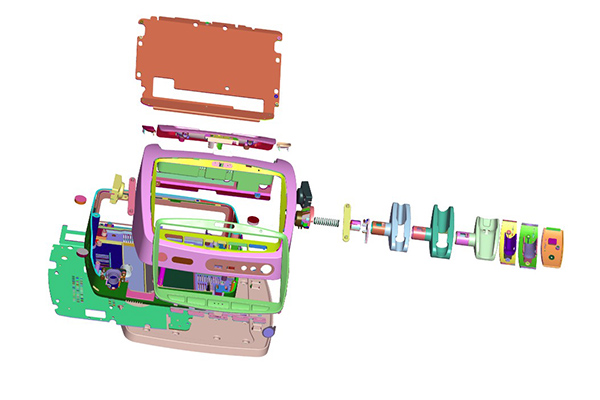
Vacuum Casting The Prototypes
VisionFlex needed full production-quality rapid prototypes of their design idea. They decided to use our vacuum casting service for a range of reasons including the fact that it reduces costs since you don’t need any hard steel injection molding tools when using vacuum casting. It is also a fast and high quality way to make low volumes of their products as they ramp up to full production.
Another reason they chose our vacuum casting process is that the quality of vacuum casted parts is excellent, easily able to reproduce even fine surface detailing from the original patterns. Finally, there are many casting resins available that can simulate a variety of production grade plastics and elastomers.
To create vacuum casting prototypes a few simple steps are required to make silicone molds that can be used for 20 or more copies of an original pattern. The secret to achieving great results is in attention to detail, starting with the master patterns.
Step One: Making Master Patterns
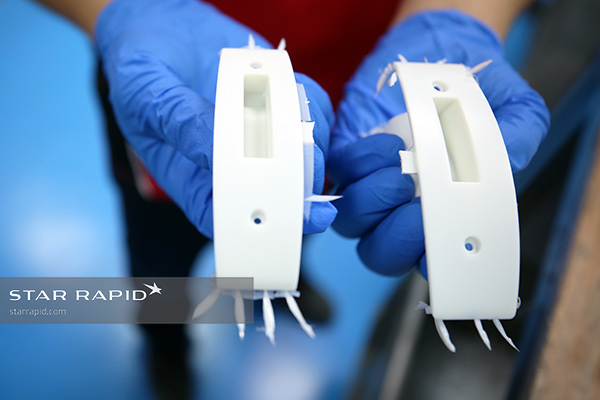
Master patterns can be made from any stable, solid material that’s able to withstand temperatures up to 100 C. Simple shapes can be CNC machined, but in this case we used SLA 3D printing and SOMOS 14120 UV resin.
Once cured, the SOMOS resin becomes a solid part much like nylon, perfect as a substrate for this purpose but it did need some additional finish work.
Step Two: Preparing the Silicone Molds
Once the patterns were ready, we then built molds for vacuum casting. Preparing these molds required us to pay attention to many important details including the following.
Split Lines
The first step is to carefully analyze every component. We look for the ideal place to locate the split line for each part. The split line is where the mold will open into two or more sections. This line is important for a few reasons.
Our mold makers need to be sure we can easily remove the part later without damaging the surface or losing fidelity on any important features.
Also, the split line might leave behind a thin mark on the finished part. We try to hide this whenever we can, either by incorporating it into the overall design, or putting it in a place where it can be sanded off in post-finishing. This can be tricky to do with some complicated shapes.
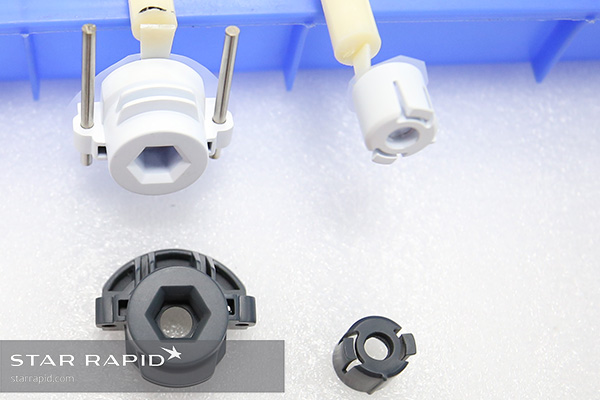
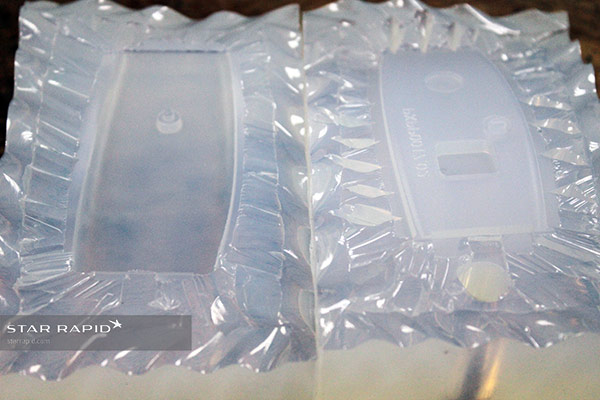
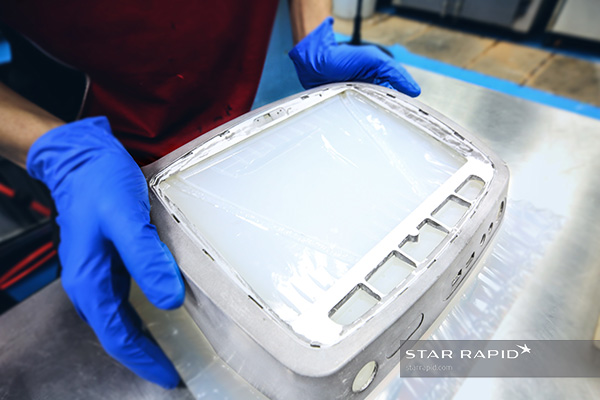
Once the split line was located, we placed a thin film or skirt around the perimeter of the part. This film is essential for allowing the mold to separate after it’s solidified.
All patterns need to be mounted on a dowel rod. These rods are used to suspend the patterns inside the molding box, preventing the patterns from touching any of the sides or the bottom when the silicone is poured in.
Pouring the Molds
With the dowel rods attached, master patterns were lowered into the casting box and held stationary with a temporary mounting plate. These patterns must be located so that they don’t touch the bottom or sides of the box.
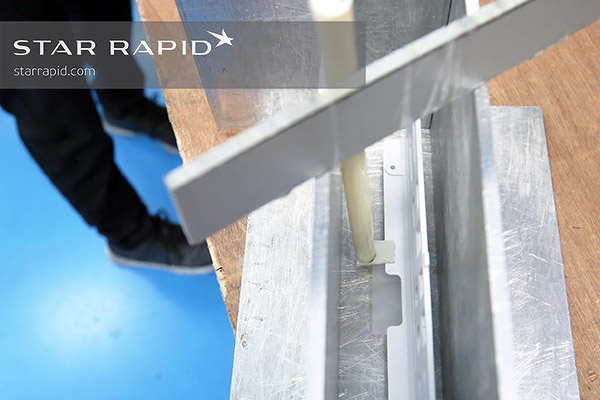
Curing the Molds
Once poured, the boxes were placed in an oven and left overnight to cure completely.
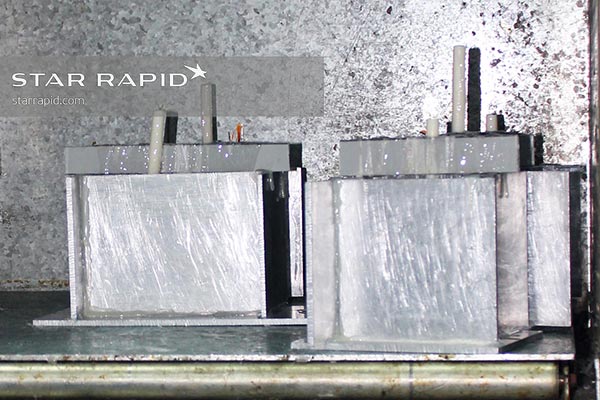
Removing the Master Patterns
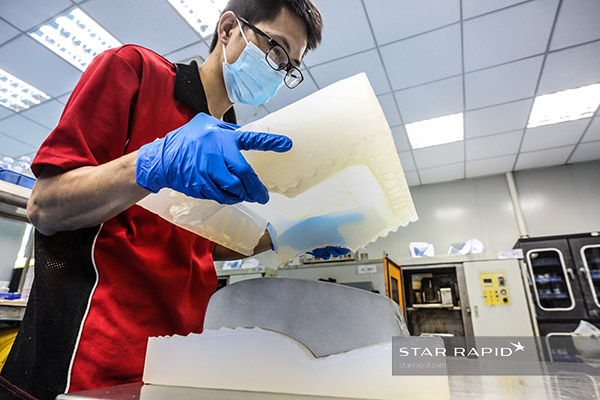
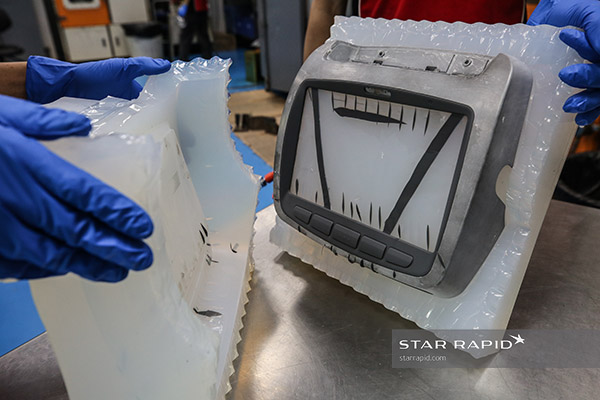
After the molds were fully cured, the molds were opened and the patterns removed. This job is trickier than it looks, and must be done very carefully.
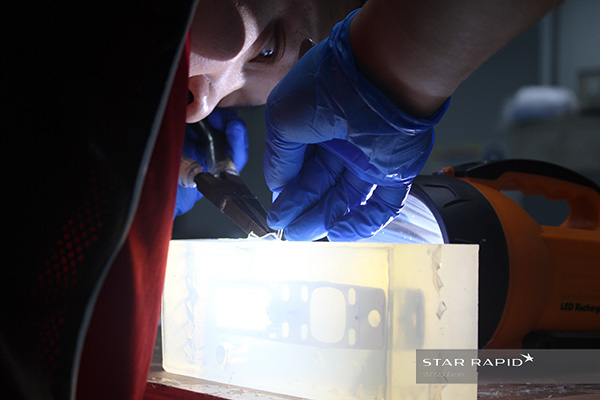
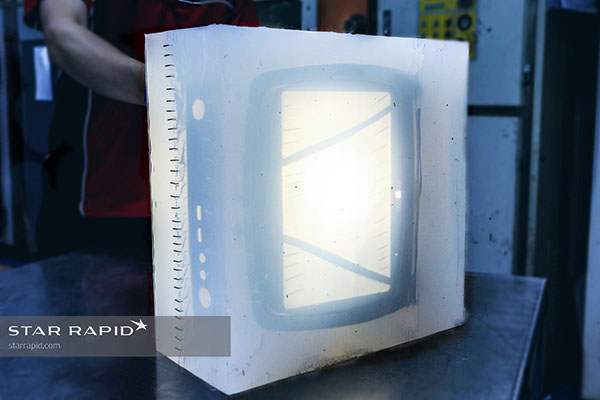
We then used a strong light source to peer into the translucent depths of the mold. We cut a sawtooth pattern along the split line, being careful not to damage the pattern itself. Later, this sawtooth cut will be important for re-sealing the mold in the correct orientation when the molds are put back together for making copies.
Step Three: Making Copies
Once the molds are ready, they can be re-used up to twenty times to make identical copies of the original master patterns. After that they begin to degrade and need to be remade.
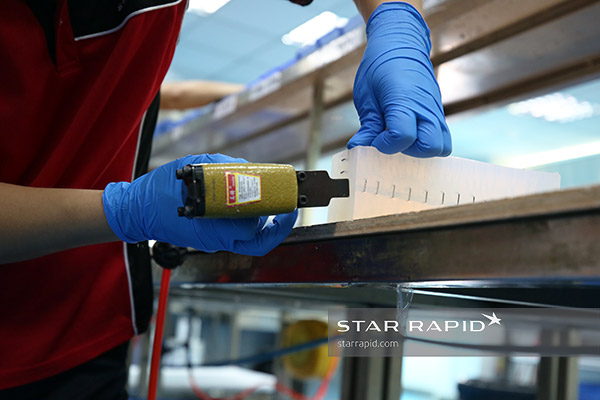
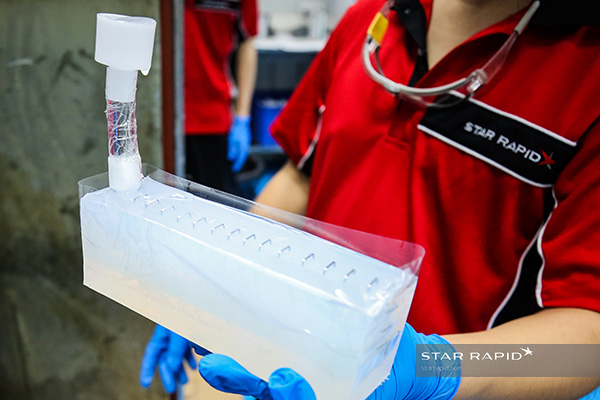
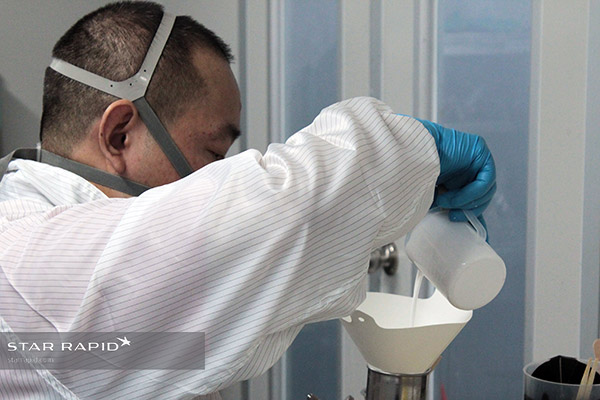
Once the molds were sealed, we poured liquid resin into the cavity and then placed the molds in a vacuum chamber for several hours while the resin cured.
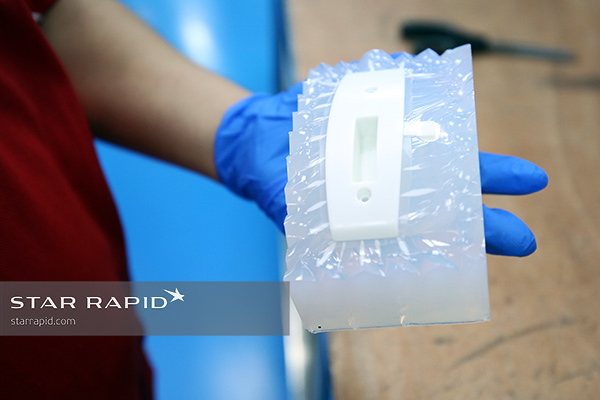
Over Molding
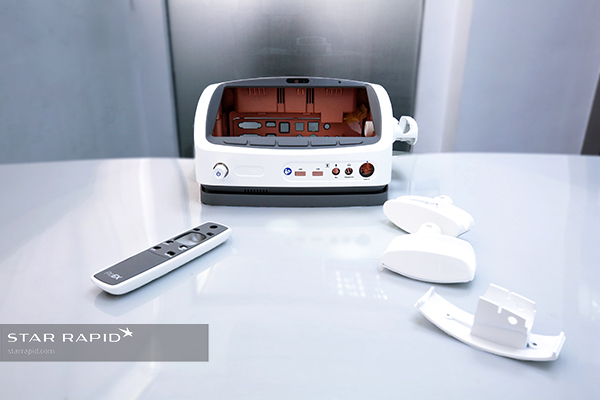
Vacuum casting allows us to mold two or more dissimilar materials together. In this case, a soft elastomer rubber bezel was molded over the top enclosure, surrounding the aperture where a display monitor will later be installed.
Painting
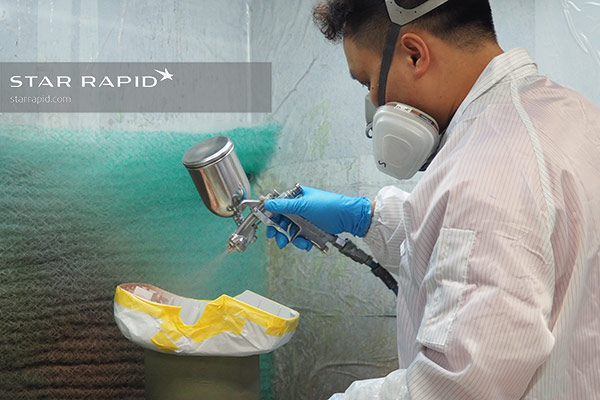
A great paint job is the secret to making a beautiful finished product, so we take pride in offering premium quality prep and painting services on every project.
We used a black marker to indicate areas that still hadn’t been touched up yet.
We used a black marker to indicate areas that still hadn’t been touched up yet.
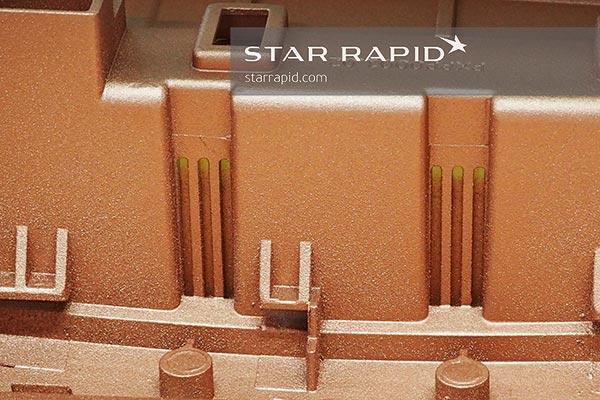
Notice here the metallized copper paint on the inside of the enclosure. This is an electromagnetic compatability (EMC) coating, a mixture of silver and copper. Since plastic by itself is usually transparent to electrical signals, this coating provides shielding for the delicate electronic components that will later be installed inside the case.
CNC Machining
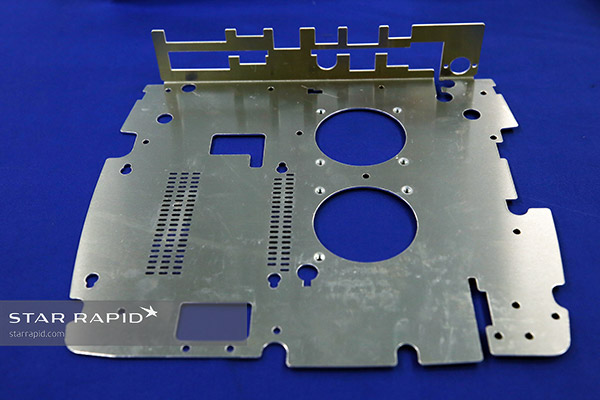
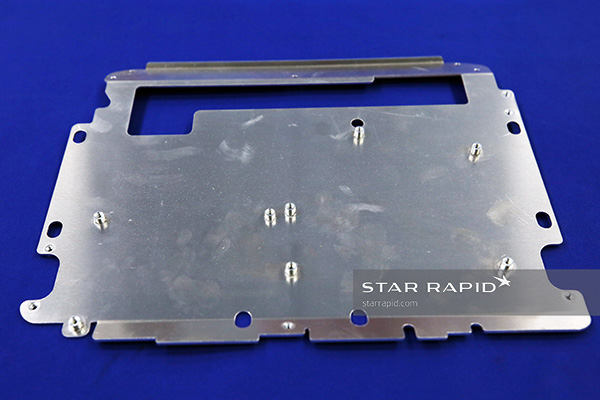
In addition to casting all of the plastic parts, we also needed to make some base plates from aluminum sheet metal.
If this were high-volume production, such a plate would be stamped from a sheet using a custom-made die. However, that trouble and expense is not justified for a prototype, so instead we used a CNC mill to cut out the general profile of the plate.
A gloss finish is good not just for cosmetic reasons. Smooth, glass-like surfaces are easier to clean and will not trap biological material used in this medical application.
A gloss finish is good not just for cosmetic reasons. Smooth, glass-like surfaces are easier to clean and will not trap biological material used in this medical application.
Putting it All Together
Providing health care solutions to those in need is something that Visionflex can rightly be proud of. We’re honored we were able to make the ProEX a success, and are standing by to help you do the same on your next project when you upload your CAD files for a free quotation.
Want More Inspiration?
We have a library of case studies that show what we offer in Pressure Die Casting, Metal 3D Printing, CNC Machining and much more!
